 LayerCut
The LayerCut window
Settings on the left, your model or cut sheets on the right, and a summary of the result along the top.
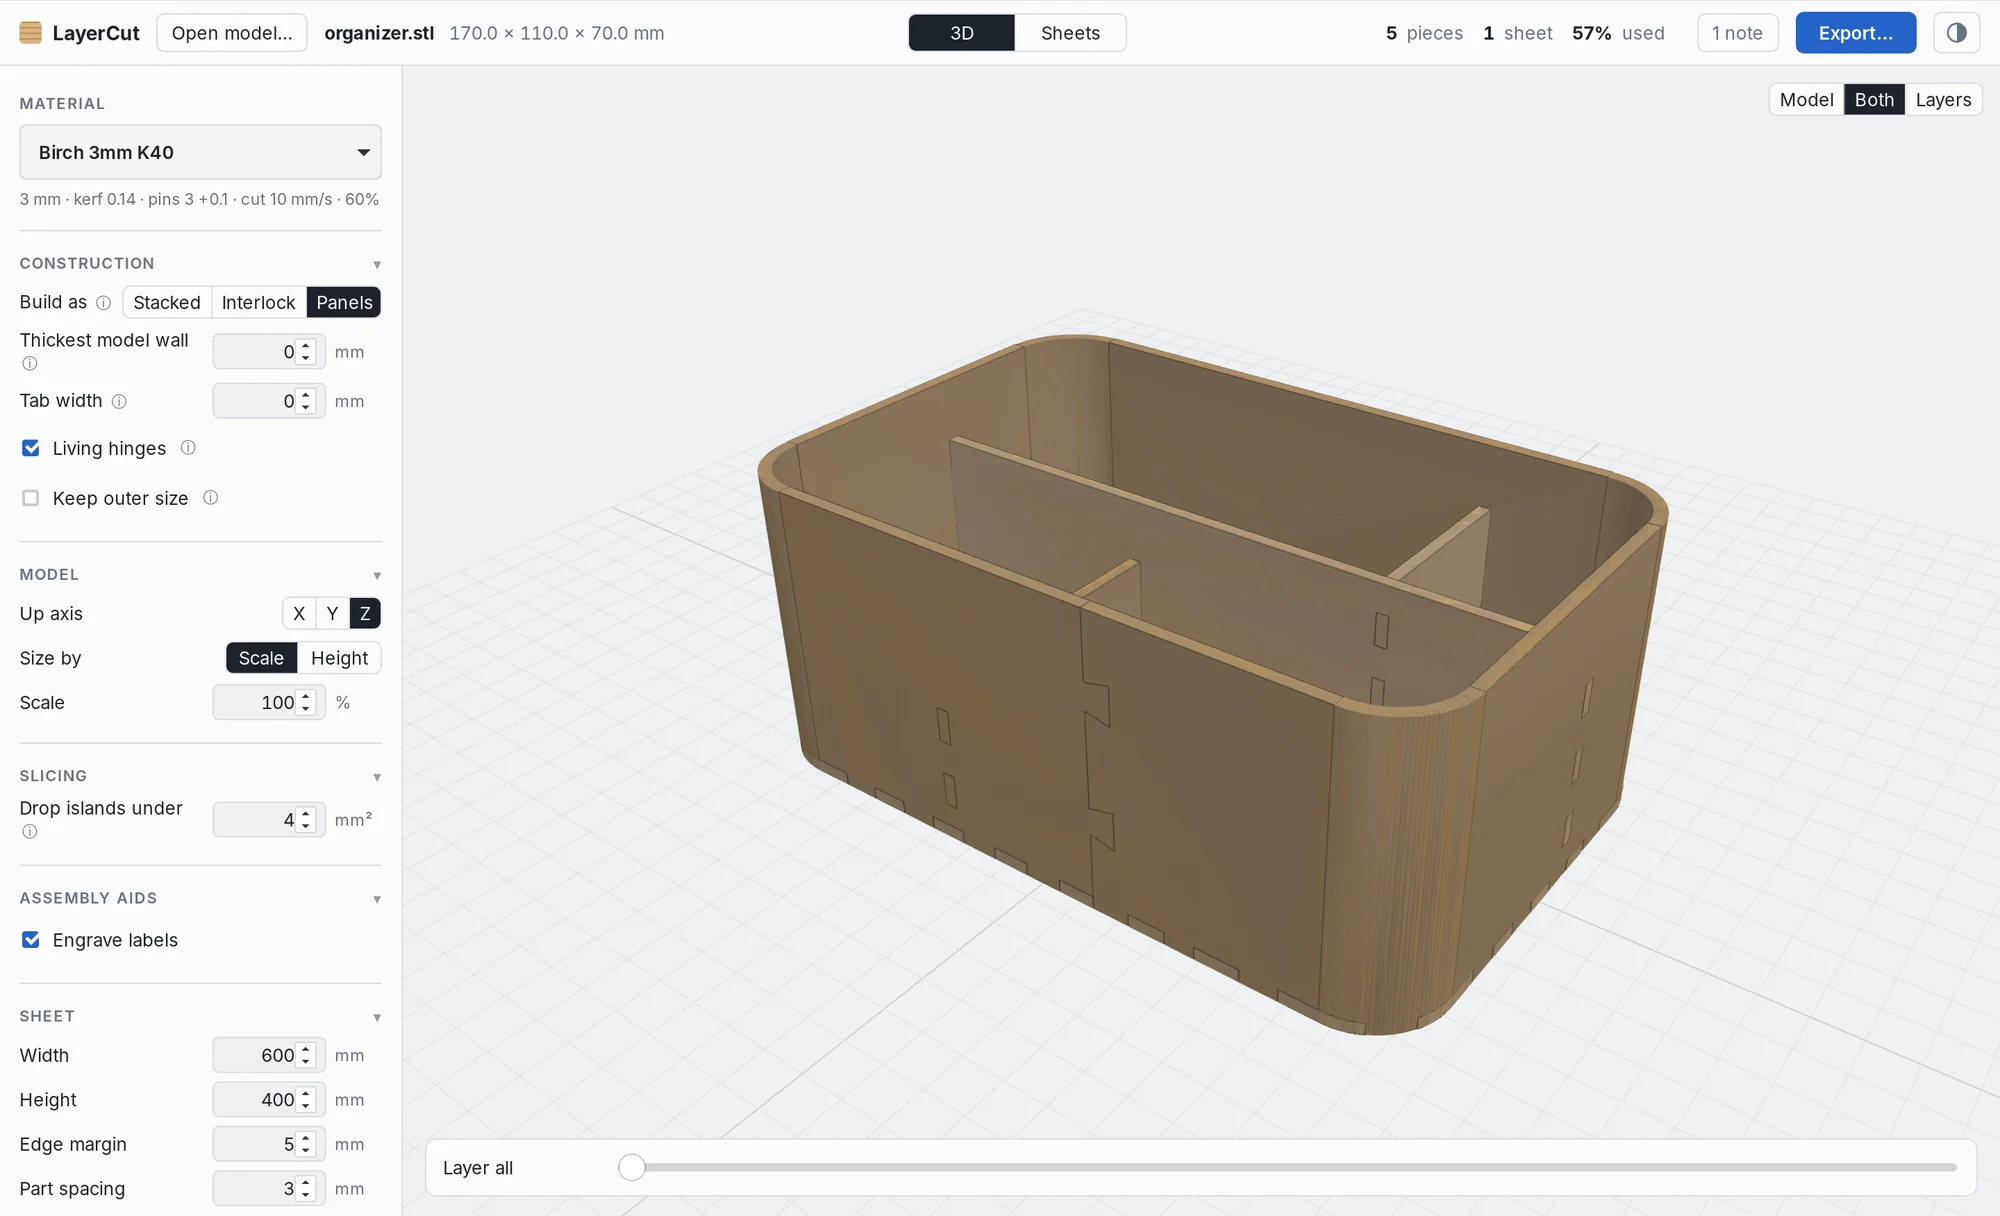
The top bar
From left to right:
- Open model… opens an STL or OBJ file. The model's name and size sit next to it. If the mesh has holes, the number of open edges is shown here too.
- 3D and Sheets switch the main view (⌘1 and ⌘2).
- The result summary: pieces, sheets and the share of material used. Click it for details such as stack height, footprint, and what's left over on the last sheet.
- Warnings and notes: a badge appears when LayerCut has something to tell you. Click it to read the messages. See Warnings and notes.
- Export… writes the cut files (⌘E).
- Appearance (the half-filled circle): light, dark or follow the system, and the accent color.
The settings
The sidebar is split into sections. Click a section's name to fold it away; LayerCut remembers which are open. Settings with an ⓘ show a short explanation when you hover over it.
| Section | What it holds |
|---|---|
| Material | The material you're cutting. Its values are summed up underneath. |
| Construction | How the model is built, and that mode's settings. |
| Model | Up axis, and size by scale or height. |
| Slicing | Where in each layer to slice, and the smallest island to keep. |
| Assembly aids | Alignment pins, engraved labels and guide lines. |
| Sheet | Sheet size, edge margin, spacing between parts, and rotation. |
Every change re-slices the model straight away. Large models can take a second or two; Updating… shows while it works.
The 3D view
Drag to orbit, scroll or pinch to zoom, and right-drag to pan. The buttons in the top right choose what's shown:
- Model: just your original model.
- Both: the cut pieces with a faint outline of the model, to compare them.
- Layers: just the cut pieces.
In Stacked mode, the Layer slider along the bottom builds the piece up one layer at a time, as you will when you glue it.
In Interlocking mode, Move slices lets you drag a single slice along its axis in the 3D view, in 0.5 mm steps, or 0.1 mm with Shift. Moved slices are listed in the sidebar with a Reset link.
The Sheets view
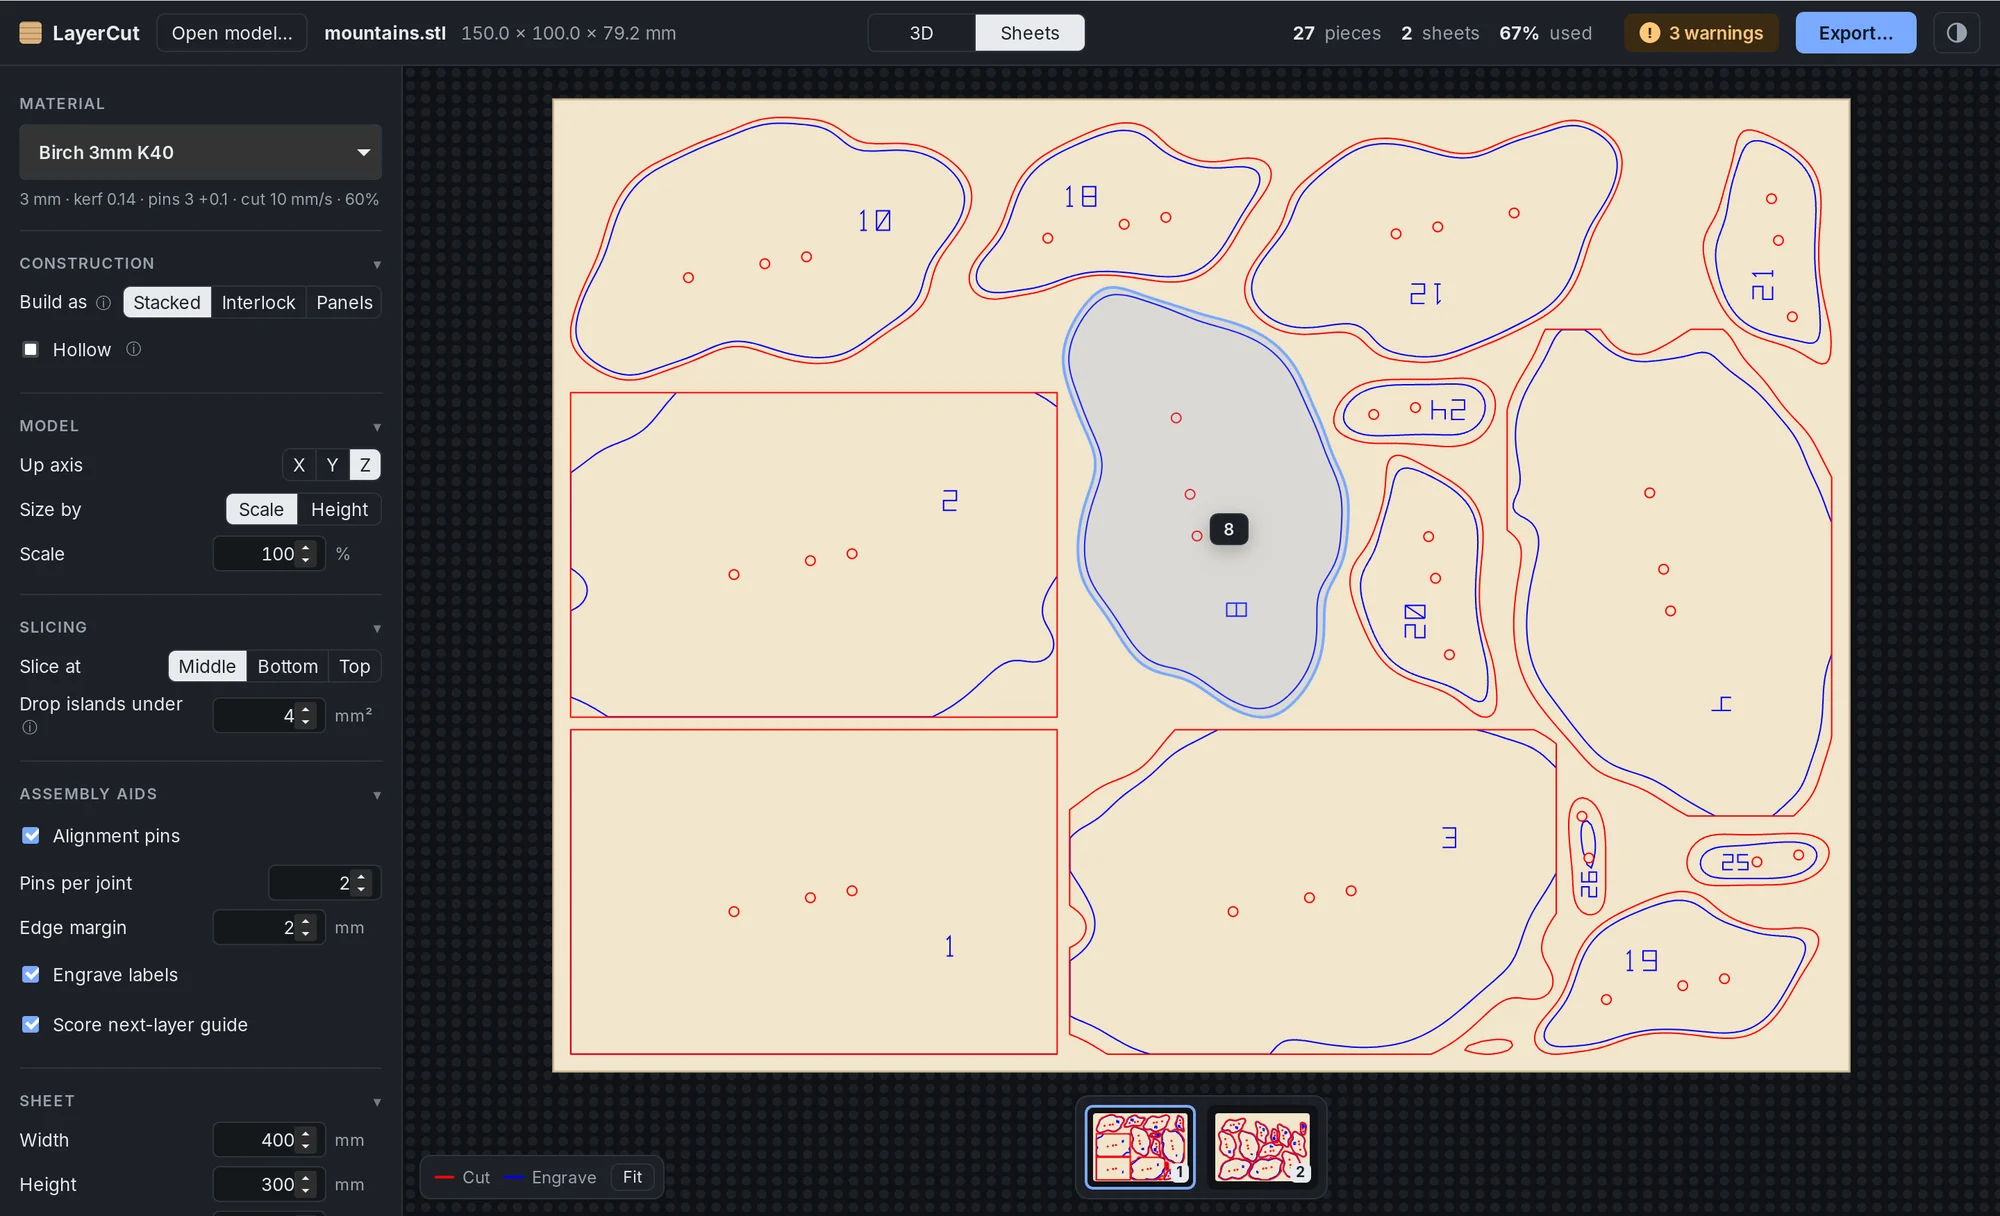
Each sheet is shown full size on a laser bed, in the colors LightBurn uses: red lines are cut, blue lines are engraved.
- Scroll or pinch to zoom, and drag to move around.
- Fit (⌘0) shows the whole sheet again.
- When there's more than one sheet, thumbnails along the bottom switch between them. ← and → do the same.
- Click a piece to jump to the 3D view with that piece highlighted. Esc clears the highlight.
Appearance
Click the half-filled circle in the top bar, or choose View → Appearance…. Pick System, Light or Dark, and one of six accent colors: blue, green, teal, violet, graphite or orange. ⇧⌘L switches between light and dark.